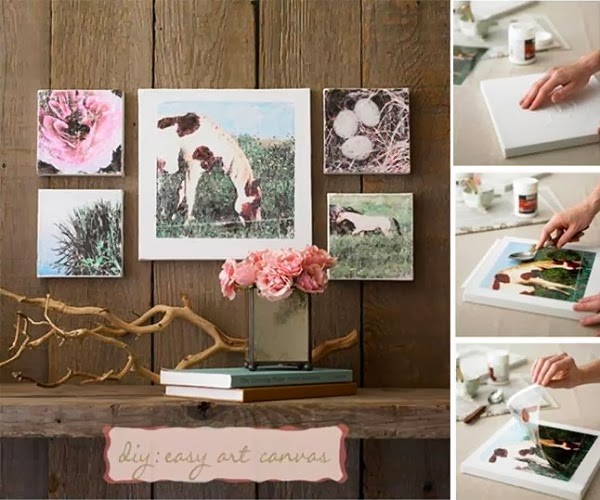
Having a good painting hanging on the wall isn’t a thing that DIY enthusiasts can’t handle. With no artistic painting skills or a big wallet, you could use a simple photo and no more than $10 to turn your room into your very own art gallery. Materials needed:
- any photo (on regular printer paper);
- any size canvas (preferably the two match);
- gel medium (i.e. Studio Multi-Medium);
- paint brush;
First, completely coat your canvas with the gel medium. Make sure you get inside all of the lumps in the canvas and the gel-covered surface is as smooth as possible; you don’t want any bubbles. Spread the medium until the surface becomes shiny. Afterward, put the photo (picture side down) and make sure it’s exactly in position because you can’t really move it while you start the process of transferring the image by gently pressing on the surface. You can wrap the edges of the photo if it’s larger than the canvas, or just leave it like that. Continue to press until you have no more wrinkles left. Try not to get the gel on top of the paper because it will ruin the transfer. Let to dry for 24 hours, so the ink will get really well into the canvas.
Use a damp sponge to saturate your paper. If there are any white spots, make sure you sponge them especially. But don’t stress about it to much, as it’s not intended to be a perfect transfer. Next, when the paper is completely saturated, gently sponge the paper away (it will peel off easily). Don’t go many times across one area though, because it will peel the image off as well! Use your hand (don’t use nails) in a movement similar to that you use with the sponge. Let it dry for a while (an hour or so) and then repeat the technique. It takes about three times to make it look great. Congratulation! Your artwork is finished. You can hang it like that or apply a gloss seal on top, to give it a professional look.

Photos on canvas are absolutely gorgeous! Thanks for the instructions, I can’t wait to make my own photo canvas 🙂
Do you put the photo back down and saturate it again
Love this! I used this technique to make a headboard using maps of places we have vacationed (make sure to print mirror image so it transfers the wording and locations properly) I made 8 – 11×14 canvases then from behind I duct taped the finished transfers together making it “one” display.
interesting process. The only negative would be: Who wrote the copy for this article?? It is filled with badly composed sentences and grammar errors. Also, wasn’t the article proof-read at all?
Sorry to be such a downer, but geez – is it too much to ask?
I’ve never seen anything quite so amazing.
I must try this when I get home, I actually can’t wait! 🙂