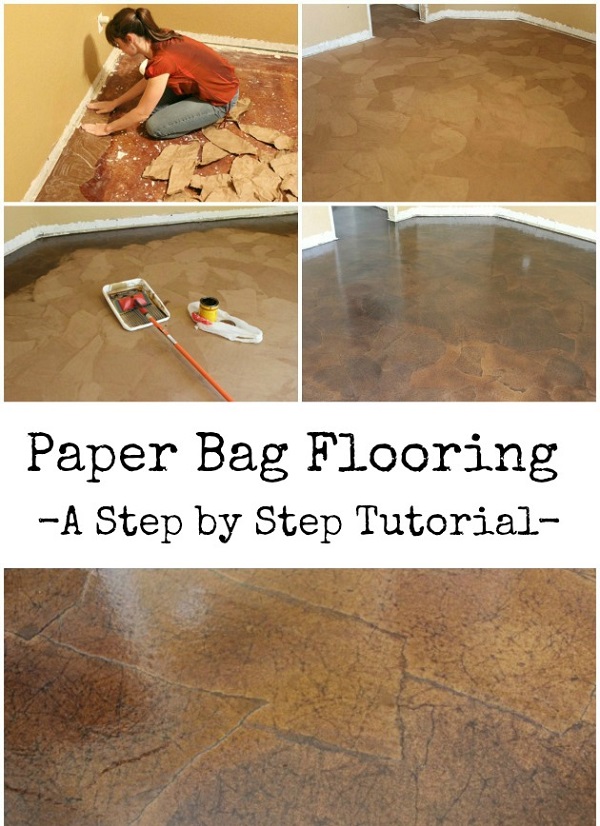
When you think about re-flooring a room, you immediately start to plan the amount of money you will spend, the bulky materials needed and so on. This stage of the process might be so stressful that you would drop the whole project. Before you do this drastic step, there is a cheaper and easier alternative. Here is what you need to have and know about making a floor out of paper bags.
For a wood floor:
• a gallon of Elmers glue;
• oil based stain;
• a 9 inch Shur-Line “deck pad”;
For a concrete floor, add:
• a small amount of concrete to patch holes from carpet tacks;
• a pole sander and sandpaper;
Start with cleaning the floors thoroughly. Let them dry before you actually do some work on them. Rip the paper into natural looking shapes, similar to stones. Don’t use a knife for this, just rip with your hands. It’s recommended you ball up each piece of paper, wrinkle the crud out of it and flatten it out, after ripping. This step will give it an `old leather` look after applying the stain.
Make a mixture of 50% glue and 50% water. Next, take each piece of paper, scoop up some glue with your hands and spread it in an even way on both sides. Place it on the floor and flatten it out to remove bubbles. Remember the paper shrinks while it dries, so try to plan the space accordingly in such a way they overlap. Do this for every piece. A long and hard work, but it’s worth it. When you’ve completed the whole floor, you will get a `natural` look and color which you might like – and avoid the whole staining process. But if you choose to do stain, it will give the floor some character. Apply the stain by using a Shur Line `mop` on the entire surface. This will take about half an hour. Be careful you don’t end up with any lines, and be aware there will be little bleed under the edges of the paper.
source and more info –> domesticimperfection.com

how does it wear? withstand spills? do you cover with a polyurethane? how do you clean it? It is really a cool look.
Here is a link to the original tutorial, it explains everything: http://www.domesticimperfection.com/2013/03/paper-bag-floors-a-tutorial/
I actually did this and I love the final results. I however had several challenges, which required me to repaper 3 different times. It was definitely a learning experience and I sure wish I had known some of the things before I started. 🙂 I actually wrote a blog about my experience in case anyone else is thinking about doing this. I learned a few good lessons. http://apurposefulpath.blogspot.com/2014/03/my-first-paper-bag-floor-test-and-learn.html
Enjoy – I hope many people can learn from my mistakes. 🙂
This is awesome.. I think to do the same thing with my home.. thanks for sharing.
would love to do this, but worried about how long it would take and not being able to use me kitchen while doing it
perdon en donde consigo la mancha a base d aceite o se conose con otro nombre graciaz
la mancha a base d aceite donde se compra tendra algun otro nombre graxiaz
Wow that was unusual. I just wrote an extremely
long comment but after I clicked submit my comment didn’t show up.
Grrrr… well I’m not writing all that over again. Anyhow, just wanted to say wonderful blog!
Hey there! Do you know if they make any plugins to protect
against hackers? I’m kinda paranoid about losing everything I’ve worked hard on.
Any suggestions?
This website truly has all the info I needed concerning this
subject and didn’t know who to ask.
What i do not realize is actually how you’re no longer really much more well-preferred than you may be now.
You are very intelligent. You know thus considerably
in the case of this topic, produced me for my part imagine it from numerous varied angles.
Its like men and women don’t seem to be interested except it’s one
thing to do with Lady gaga! Your own stuffs excellent. All the time care for it up!