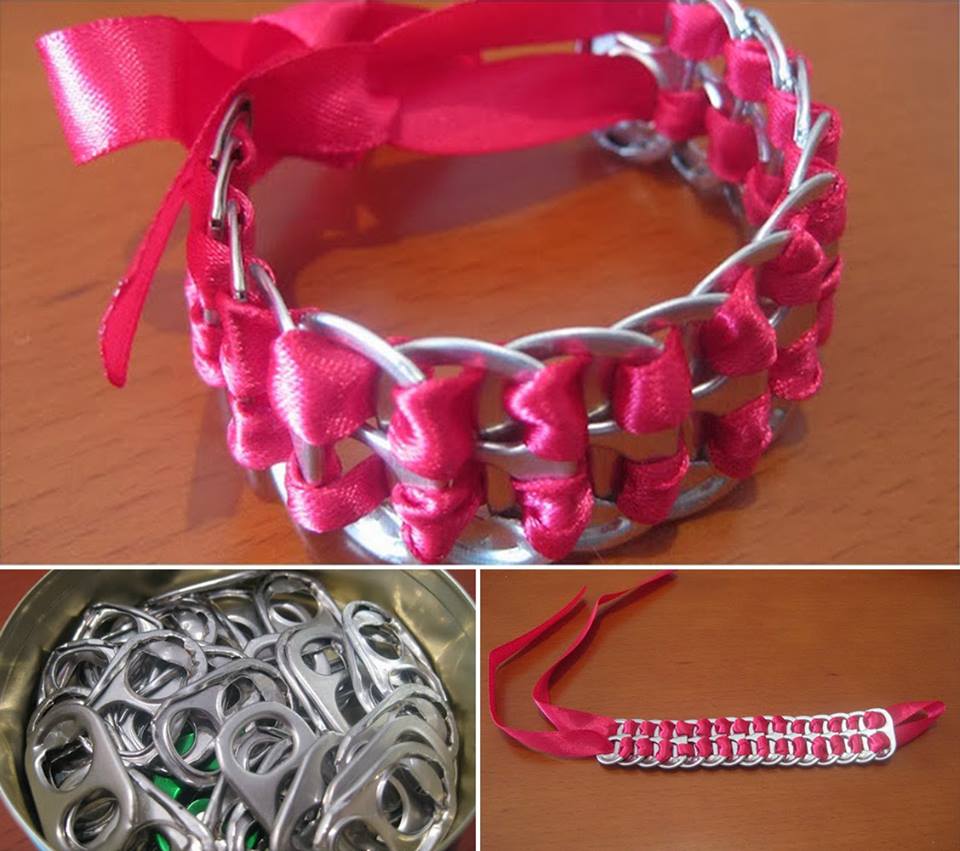
A bracelet is one accessory that is easily fashionable and the best part is you can make it out of almost anything. Remember when you used to tie a flower or a thread of grass around your arm? Well, you can do that with soda pop tabs. Just grab these materials:
• plenty of pull-tabs;
• white and transparent nail polish;
• 2 safety pins;
• ribbon;
And pay attention to the following instructions. Start by painting each tab with white polish and then apply some transparent polish after the first coat of polish has dried. Doing so, will give the tabs a nice aspect and hide that hard metal look and feeling.
Take one pin and go through one end of the ribbon. Do the same with the other pin and end. Grab the ends and fold the ribbon in half widthwise, placing the pins together side by side. Now begin working with the first tab. Put each pin-attached-end of the ribbon through each hole of the tab and then drag it to the middle of the ribbon; remember to leave the ribbon folded in half! Make sure you don’t place all the way to the middle fold. Leave about 4 centimeters of space.
Next, place the second tab adjacent to the previous one, with its holes oriented in the opposite way of the first tab. Put the ribbon again through the holes, but make sure you also go through the first holes as well with the same movement. Repeat with the other end. Once you’ve completed this, take each end of the ribbon and make them go through the small gap you have left with the hole of the new tab and the sides of the first one.
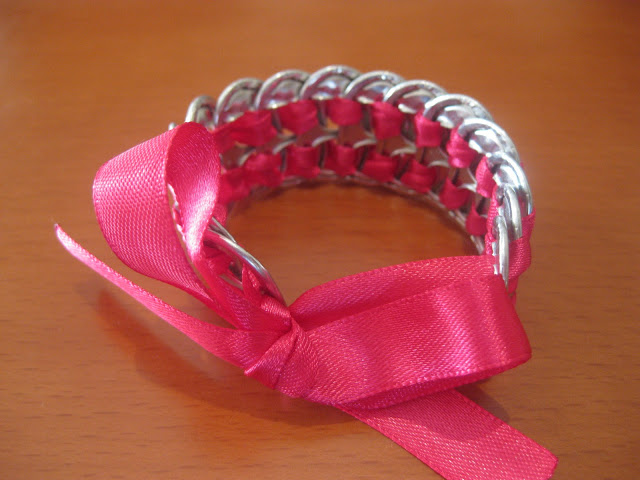
Repeat the process for each new tab added. Check along the way to see if the bracelet fits. It is advised though to take a long piece of ribbon as the technique considerably shortens it. If it’s too large in the end, just cut from the ends. Now take out the pins out of the ribbon and put one end through the gap you left earlier and tie with the other end. Make a nice bow and you’re new soda pop tab bracelet is done.
Photo credit: takingoffatnine.blogspot.com
Video tutorial: here

