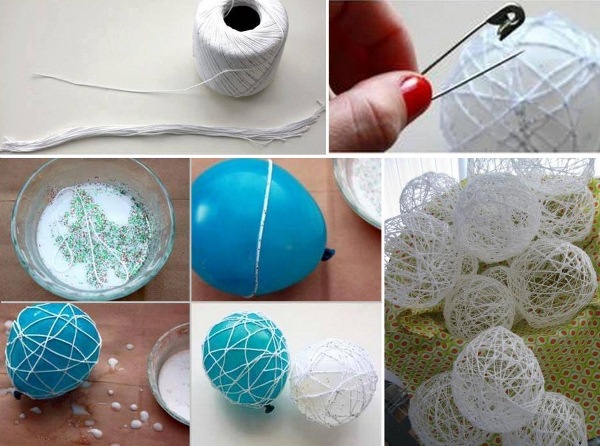
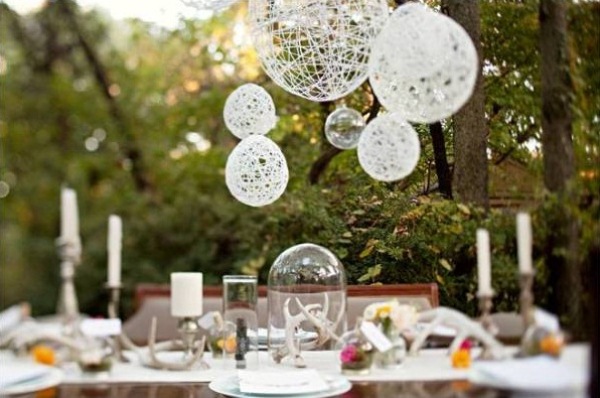
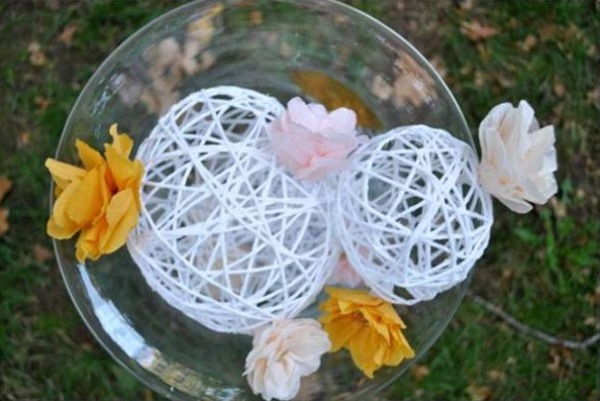
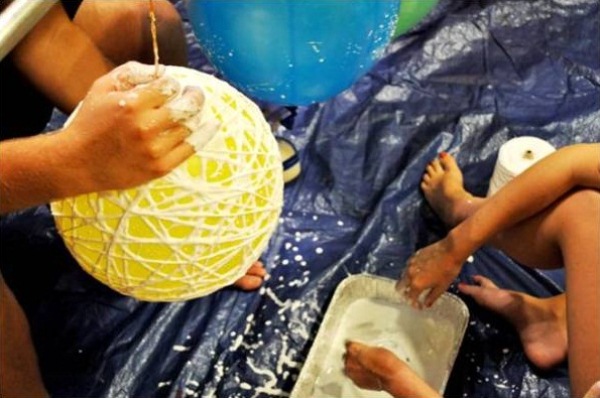
You can make a lot of great things out of strings as it is a cheap material and there are a lot of nice DIY projects on the internet based on it. This next project also uses strings and the outcome of it is quite spectacular. You will learn how to make a string-ball cahndelier that will look great in your garden at a party and even at more classy celebrations such as weddings. So if your are planning to have a party or are a party planner, this next tutorial could be a really useful one. We advice you to make this project on a sunny day as it could get a bit messy if you choose to do it inside. So wait for a nice day and make this project outside if it is possible. You will need: balloons, sharpie, scissors, cotton yarn, white glue, half a cup of corn starch, ¼ a cup of warm water, something that you can stir with, petroleum jelly, spray paint, fishing line and a container. The first step is to blow up one balloon. Then take the sharpie and draw a circle around the knot of the balloon, this will be the place where you will insert the lightbulb or any other lighting piece. Mix together the corn starch with the glue and the warm water. Cover the balloon with petroleum jelly. Now you will take the yarn, dip it in the glue mix and start covering the balloon with it. Make sure you cover the end and the start of the yarn by putting it under other pieces of the yarn. Wrap the yarn horizontally then vertically around the balloon. Leave everything to dry for 1 day and pop the balloon at the end. Spray the ball with spray paint ant that is all. Now all is left of to insert the lightbulb and find a nice place in your garden where you can hang your amazing string chandelier.
-
 Banana Duck Sculptur... 3 months ago
 -
 This is the Cutest C... 3 months ago
 -
 DIY Lego Table... 3 months ago
 -
 HOW TO MAKE A BUTTER... 3 months ago
 -
Incredible Dog Feedi... 3 months ago
-
 These Measuring Cups... 3 months ago
About us
Goodshomedesign is an online home design magazine but do not sell the products reviewed or showcased on this site. We try to show you what is new and beautiful in this area, arranged in several categories (apartments, ideas, interior design, home decor, home design, kitchen, bedroom, bathroom, furniture, hotels & resorts, architecture) related to the area and style.
Friends & Partners
Submit your work
Want to publish your own work?! Show us what you’ve got! We would love to check out the personal work created by any of our amazing fans. If you really have something good, we will publish it with your own name in our online magazine.
© 2025 Home Design, Garden & Architecture Blog Magazine. All rights reserved.







Wow. That is amazing. How do I find you on Facebook?
Click the blue and white F just below the headings along the top of the page
is white glue important ?
yes it is because it helps it to get really really hard
I have same questionas amna, is white glue important? My other question is to what size light bulb are you using, and how are you putting a light bulb inside it without a light bulb socket?
Shelly – You can buy light fixtures that are just a long cord with the plug in on one end and the light bulb socket at the other end. You plug them into the wall and then hang a hook or something from the ceiling to hang these types of shades.
can you add food color to the glue
I imagine food colouring would work, but only add a bit as it would reduce the integrity of the glue.
is white glue important ?
hi, creative one. Is there an alternative for the corn starch?
I think cornstarch is required to create a stiffening so it will keep shape.
thankyou very much
Sugar is also good! My Mom made this in 89′ (red color).
I am wondering what the Fishing Line is for?? I didn’t see where it said it was used?? Love this, would like to try it 🙂
I think the fishing line is used to hang the finished string balls.
You can use the fishing line to hang & attach the balls together .
would yarn work for this project and also what kind of glue
approx. how much time required for stiffening & what is the proportion of white glue?
i have made it with balloons but it is not in round shape . Any option for balloons?
Can you substitute flour for cornstarch?
wat is corn starch and where do I get it
how can we insert the bulb in to it? could u plzzz tel me? how is the process?
how much white glue do you need to use?