Second, arrange the bricks without fixing them into position at first. After you’ve decided it’s the perfect shape and design, create the arch. It is recommended this will be two thirds of the size of the entire oven. Make a temporary support with the foam and a couple of bricks. Move on to the cementing part of your project. Mix one part cement with three parts fine sand for this stage. Here comes a nice trick: glue the first ground layer in place and put the cellophane sheet across. Fill it with sand to the point it will be a mould of the inside of the oven.
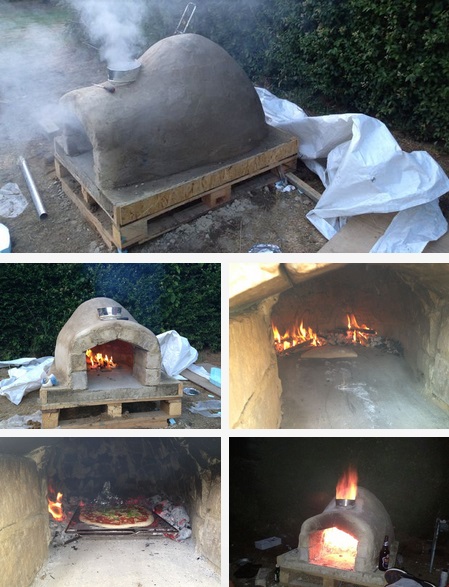
Remember to wrap the sheet over the sand so it won’t stick to the bricks while you build it up with cement. You could place a bucket or pot, like shown in the photos, to act like a chimney. Now, make another mix of cement like before and spread it outside the oven. Leave to dry for a couple of days and take out the cellophane and supports afterward. Before you start cooking amazing pizzas, make a fire in your brand new handmade oven to dry the inside as well. It’s time for baking. Enjoy!
source and more details: instructables.com
More creative ideas…
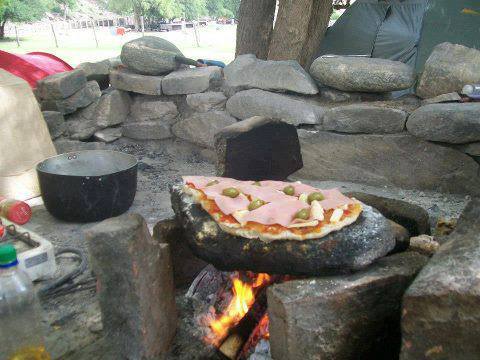 Old School Camping Pizza making, all you need is a flat stone.


Brilliant.Thank you for the simplest version ever.
Cement does not last long around fire. The mix ratio is one part cement to two parts sand and three parts gravel. For more fire resistant concrete replace half of the sand with ball clay.
Good job. Might be worth adding fire clay to the concrete next time to make it last longer.
what is a chipboard?
Chipboard is also known as particle board. A quick google will give you all the info you need.
Mix clay and grog and that would work too.