Children often find odd places to sit and play. It doesn’t matter how colorful the table you bought from the furniture store looks, they always want to draw, paint or play in any other place that you planned for them. The answer to this problem is a homemade portable table. An ingenious idea for those recycled tubes and cardboards lying around the house. Materials:
• 5 pieces of cardboard
• tubes
• a knife
• glue
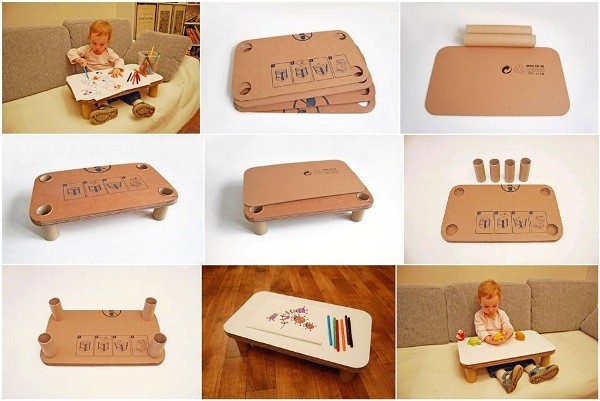
Steps: Use the knife to cut round edges on the cardboard pieces, and also give the same size (I recommend 55 x 31 cm) to all pieces. Cut holes with a radius of 5 cm (or what diameters your tubes have) on each corner of 4 of your cardboards. Using a round model will make the table more stable and not that easy to topple. You can use the first cardboard you cut as a template for the others.
Glue the cardboards together. Be sure not to fill the holes. Attach the last piece of cardboard (who doesn’t have round holes in it) on top. You can decorate the top with some adhesive tape, to give it a clean surface; you can also change it when it gets deteriorated. Stick in the tubes and the table is ready. Your kid can easily use the sofa as its play-area.


That’s clever- but if instead of putting on that final layer of cardboard….
…pop plastic cups into the tops of the holes of the legs and the children will have handy places to put their pens/crayons in.
Alternatively you use 6 pieces and then could glue 2 of each section of cardboard together and using both sides of each piece you could either draw or glue paper game surfaces to each side. you’d then have 6 interchangeable game boards (chutes and ladders-candy land-checkers-etc, or scale up the size and make it for a larger kid with more advanced game surfaces like chess-backgammon-etc.)