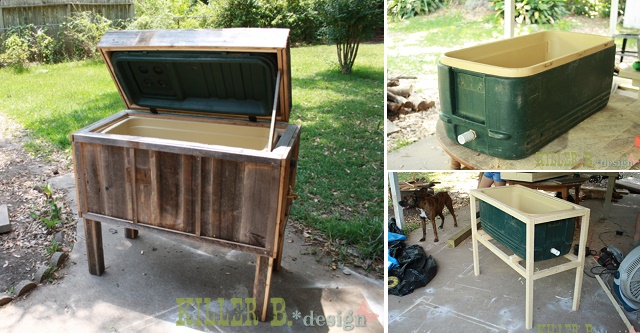
Outdoor rustic coolers are kind of a must if you live in the South where the weather is hot. You can purchase them from different stores, but they are a bit pricy, starting around $100. If you have a small budget and can’t afford such a cooler, but would really like one, just build your own. You can make a rustic cooler for less than $50, using all sorts of supplies that you already have in your home or your basement. The 2 main things you will need are barn wood and a cooler. Besides these, you will also need nails, screws and other tools (you can find the whole list in the link below). Start by disassembling the cooler and then building a new wooden structure for it, just like a box. Don’t forget to make some legs too for your rustic cooler. Make a lid and add a trim, this way you can cover your cooler any time you want. Once you are done with the structure, you can concentrate on the details and the finishing of the cooler. For a rustic effect leave it all natural, just add a coat of protective varnish to the outside and that will be all.
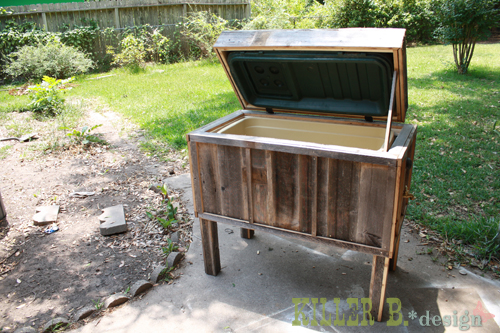
DIY Rustic Cooler: instructions by Killer B. designs


My husband and I saw this and think this is a really neat Idea!
wheres the link on the instructions?
This idea is “cooler” than most.