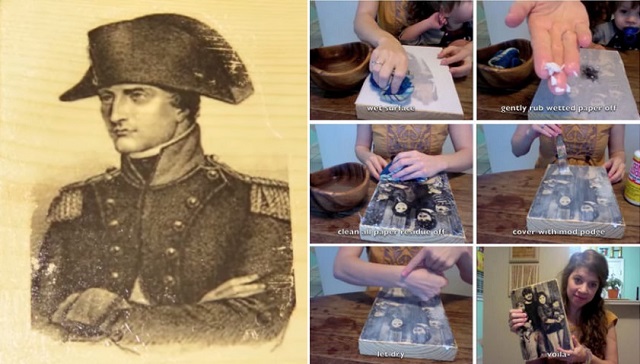
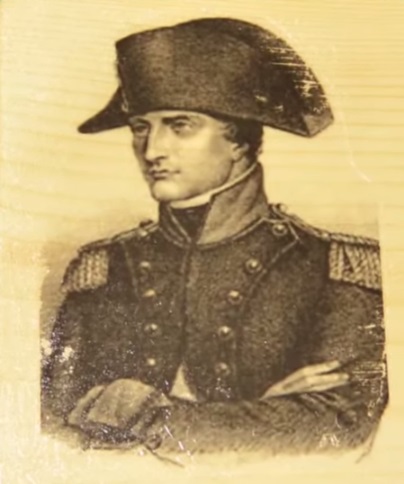
Photos are always a great gift idea as they can be more personal than any other item. If you want to surprise someone with a truly unique gift, the best idea would be to make it yourself. The following video will teach you how to transfer a photo to a wooden surface, creating a beautiful piece with a vintage feel. The whole idea is pretty simple and if you have already transferred photos to different kinds of surfaces, this project will seem a piece of cake to you. The most important part in this case is to use a clean and smooth wooden surface, so your pictures won’t turn out wrinkled and have a crystal clear look. Apply a generous coat of medium onto the wooden surface and place the pictures upside down onto the medium. From there, your task will be easy, remove the air pockets between the wood and the photo, let the wood dry and remove the paper with a wipe cloth. Watch the tutorial for all the instructions and make the most beautiful gift ever.
Here is what you’ll need:
• a picture printed on a regular piece of paper;
• a block of wood (smooth, sanded wood is recommended);
• a paint brush
• rolling pin
• plastic wrap
• varnish;
• Transfer medium
If you like, please SUBSCRIBE on Youtube. Thank you.


Could you tell me what Medium Transfer is or substitute. Are photos just printed on normal paper or photo paper
Thank you
thank you