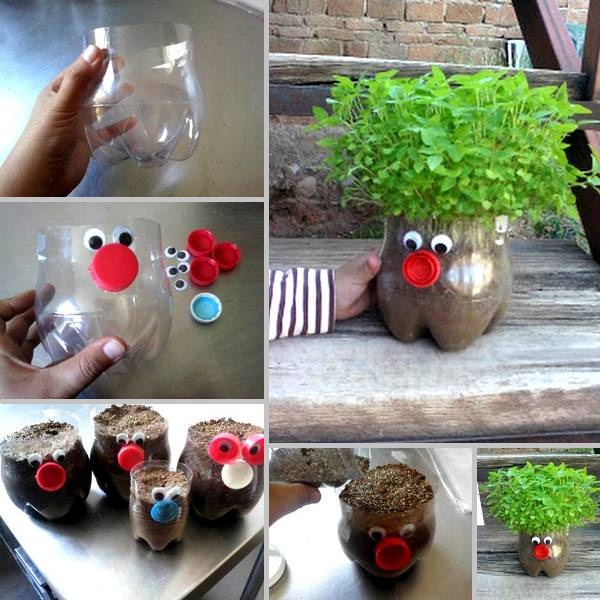
Here is a creative idea for a DIY project, about how to make a cute plastic bottle planter. Make these “pots” along with your kids for your home , also can be a great gift from kids for their grandparents. In this project was used chia seeds, but can be used any type of grass. So just follow the next steps and at the end you will have a cute plastic bottle planter:
Steps 1 – Cut the bottom of a plastic bottle. With a nail make 2 or 3 holes at the base of the bottle so the water can drain when you are watering the plant.
Step 2 – Glue the eyes and nose to the plastic bottle. You can use soda caps. You can also use paper or cardboard to make them.
Step 3 – Fill the containers with soil almost to the top (one cm. before edge).
Step 4 – Cover with a layer of bird seed or chia seeds and cover with more soil.
Step 5 – You have to keep the soil moist, watering the pots 2 up to 3 times per day (the land must be wet all the time). In a couple of days the plants will start to grow and you will have a “green hair” plant.


Nice,can I also use cooking oil caps ?
Wonder if you put little stones on.the bottom. We Would u not need to.put ahole in bottom ? Any plants you suggest?