If you lack ideas on what to use for decorating your home for this year’s Easter celebrations, you are in luck. Because we found this cute and simple project that we would like to share with you. So, don’t just gaze into your computer screen and get to work! Don’t worry though, it’s quite an easy job to make this little display of toilet paper roll of bunnies. You just need the following:
• a couple of toilet paper rolls;
• some craft glue dots;
• three different color acrylic paints;
• a couple of paint brushes;
• some Googly eyes;
• a black marker or pen;
• a white gel pen;
• three cotton balls;
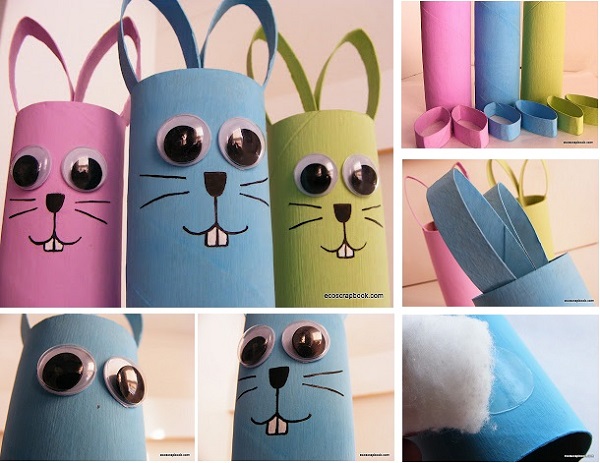
Cut half an inch of toilet paper roll strips out of the rolls. You could use a separate roll just for this step. Remember to make 2 strips for each bunny. Afterwards, apply 2 coats of different paint on each of the rolls and strips. Let them dry for a while. Then, take the strips and turn them into proper ears by gluing them to the inside of the appropriate color roll, with the help of the glue dots. Use the photo as guideline. Next, attach Googly eyes with the glue dots. Take the marker and draw the nose, whiskers and mouth of your bunny. Use the white pen to fill in the teeth. Finally, stick on the tail (cotton ball) onto the back side of your DIY bunny.
source: ecoscrapbook.blogspot.com


Bonne idée et facile à faire pour les enfants