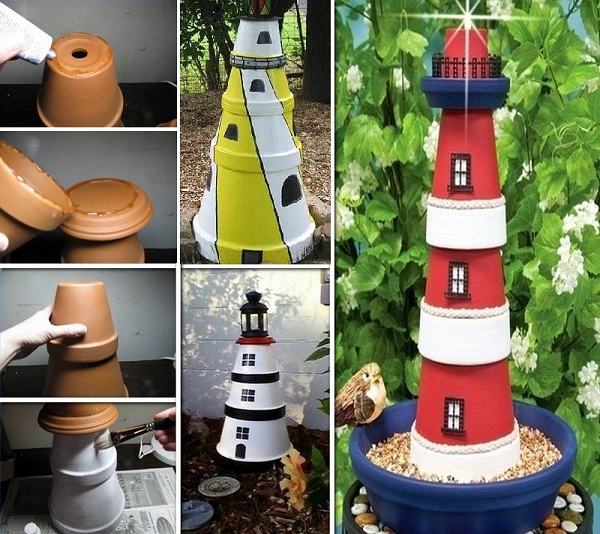
Giving your garden a great look means hard work and dedication. It also means some degree of inspiration. Decorating with gnomes is becoming outdated. What’s hip right now is all sorts of DIY projects, like this creative clay pot lighthouse. Here is what you’ll need to do and have:
• some clay pots with saucers;
• ceramic adhesive;
• white and black acrylic gloss enamel;
• paint and paintbrush;
Before you get started, make sure all the pots and saucers don’t have any residue on them. In other words, they are clean. Beginning with the biggest of the pots turned upside down, pour some adhesive on the outer rim, and then place a smaller (also turned upside down) clay pot onto it. Next put adhesive on this pot and place a saucer on it. Glue the rim of the saucer and the one of a smaller clay pot (turned upside down as well). They should fit together. Let them stick for a couple of hours, or over the night to be certain.
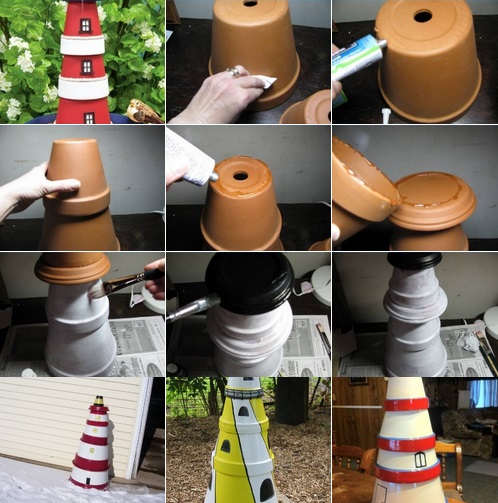
Now it’s time for your artistic skills to kick in. Paint the clay pots white and black, as you would see in a real lighthouse. Be creative and do some windows or door on your object. Finally, to act like a lighthouse, place a lamp on top or a candle. In fact, let your imagination run wild and use it as bird feeder. Anything you picture will make your garden look great.
source: eHow


this is so cute! I love this idea. It looks pretty simple to put together as well. Thanks for sharing.
This is a great idea, thanks for sharing. This is one I will have to try.
What did you use for the railing on top?
im going to put a solar light in mine ;0
Great idea thanks for sharing