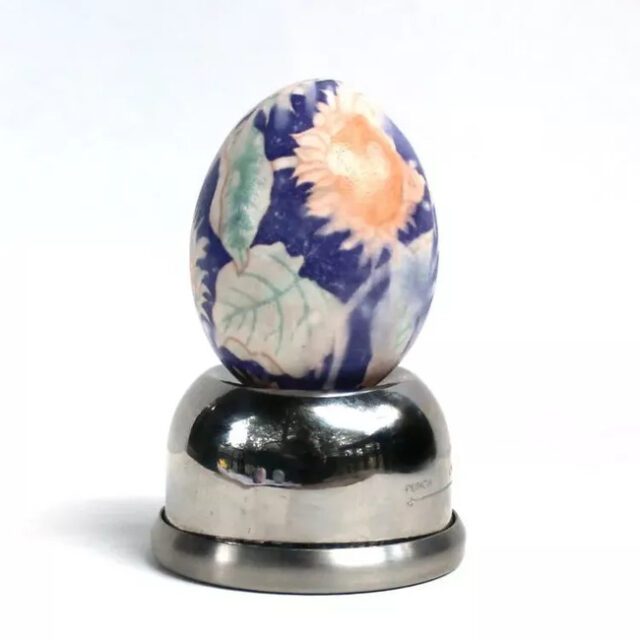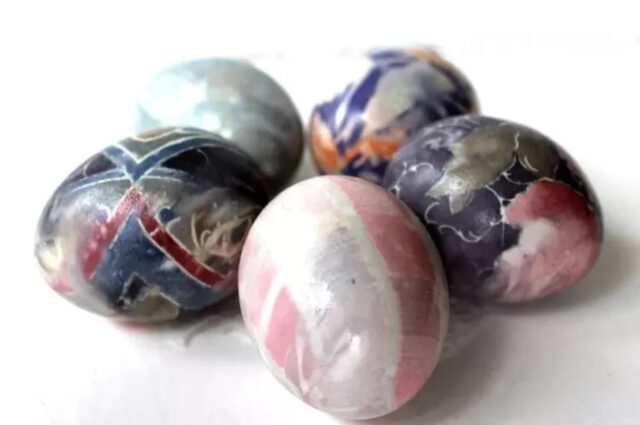
Tired of the typical Easter egg dyeing routine that ends up in a mess of cracked shells and stained fingers? Enter the captivating world of silk tie Easter eggs. This innovative technique offers a mess-free and visually stunning way to decorate your eggs, all while channeling your inner creativity. Annette Browning, a talented fiber artist, shares her expertise on this trending method that brings vibrant colors and intricate patterns to your Easter table. Inspired by the traditional silk tie transfer method, Browning discovered the unique potential of adorning eggshells with the bold prints found on silk ties. Her step-by-step tutorial unveils the secrets to achieving these exquisite eggs, making them accessible even for little ones under supervision.
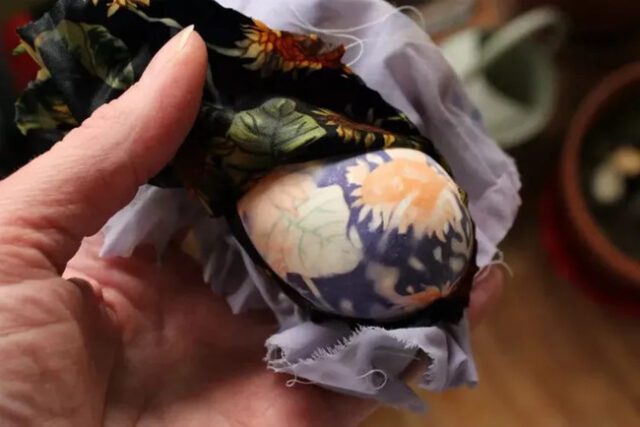
To embark on your silk tie Easter egg adventure, gather a few simple materials commonly found around the house. Raw eggs, discarded silk ties, light-colored fabric scraps, and basic kitchen items like vinegar and water are all you need to get started. The process involves carefully wrapping the eggs with silk tie fabric, securing them with thread, and simmering them in a vinegar-water mixture to reveal vibrant patterns. Browning emphasizes the importance of secure wrapping for optimal color transfer, ensuring each egg boasts clear and vivid designs. The choice of silk tie plays a significant role, with different colors and patterns offering varied results. To add a final touch of luster, a gentle rub of vegetable oil brings a subtle shine to the finished eggs, ready to be displayed as works of art (they should not be eaten as fabric die is not safe to be consumed). With silk tie Easter eggs, you can bid farewell to the messy dyeing rituals and welcome a delightful new tradition that combines creativity and elegance in one egg-cellent package.