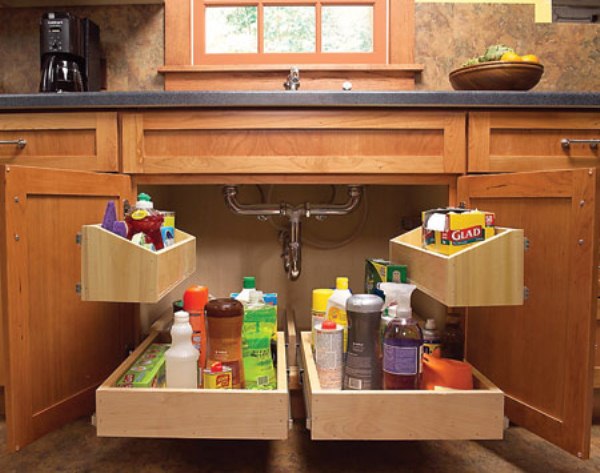
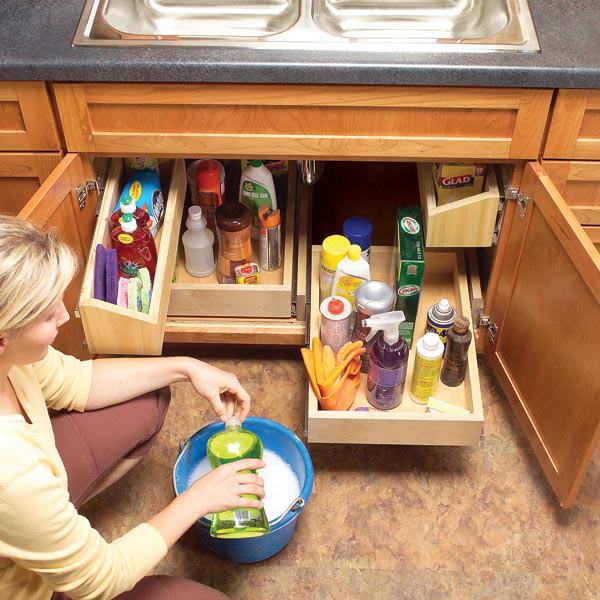
In the most of kitchens, the storage space under the sink is unuseful because of the dark and dingy. Often, not being sure what is there becomes a problem for many people. So, when a problem appears, there must be find a solution: undersink roll-out trays. The project of roll-out trays, which ride on smooth-action ball-bearing drawer glides, will get everything out in the open and let you find exactly what you need at a glance. All the trays can be made by yourself using building products from your local home center or hardware store for as little as $70. At a home center or lumberyard, look for hardwood plywood and in the hardware department, look for ball-bearing side-mount drawer glides. You’ll find this one of the most useful projects to make life in the kitchen easier. Follow the photos for the step-by-step measuring and assembly instructions.
How to make:
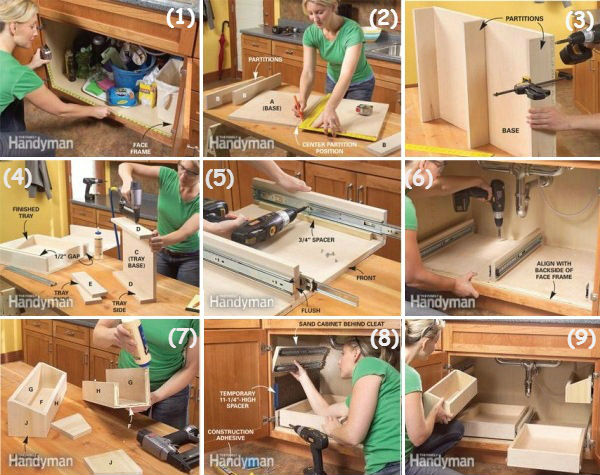
1. Measure the cabinet opening to construct the base for the lower pull-out trays and check for any plumbing obstructions;
2. Mark the base to locate the center and side partitions and be sure to locate the center partition exactly in the middle of the base; this way you’ll be able to make the two trays exactly the same size;
3. Clamp the partitions to the base, drill pilot holes, and glue and screw them to the base;
4. Build the rays by cutting the parts for the trays and glue and nail them together. Cut the bases perfectly square to keep the trays square;
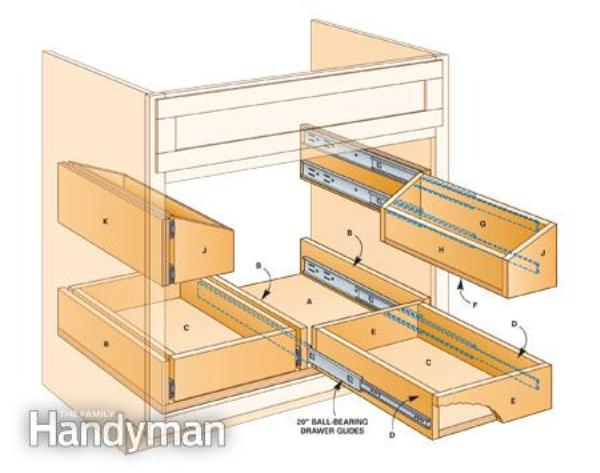
5. Fasten the glides to the partitions and the tray sides and using a spacer is key to getting the glides positioned accurately;
6. Center the base assembly inside the cabinet;
7. Build the upper trays by cutting the parts, drill pilot holes, and glue and screw them together;
8. Mount the cleats to the inside of cabinet; sand the side of the cabinet to increase the adhesion, then glue and screw the cleats to the sides of the cabinet.
9. Install the upper trays: slide the upper trays into position and test the fit; seal the trays with two coats of polyurethane to make cleaning easier.
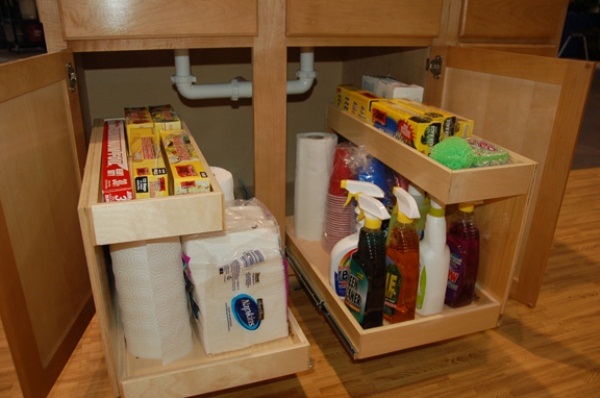 Photos source : The Family Handyman


Thanks a lot a great deal regarding discussing the following using us all you actually find out what that you are discussing! Book-marked. Be sure to in addition consult with this site Is equal to). We might employ a link deal understanding among us all
huh? … what? …
A lot of these under sink storage ideas are great. However, did you notice that when they do these none of them have a garbage disposal? They need to create ideas for people who have garbage disposals…..and who doesn’t have a garbage disposal these days.
Me I don’t have a garbage disposal!!! Refuse to have one of those nasty things:(( Most of the people I know that have them don’t use them!!
In Australia from all the houses I have seen (and I am currently looking for a rental house) and yes I even check out high priced houses for rent and sale, garbage disposals are NOT a common thing. Most of us recycle and some even use compost. So for us this is a great idea. But also it shows that you could also adapt to allow for any obstuctions.
Use under mounted slides for the bottom and you will not need the additional side mounting panels.
Detailed and clear. Thank you.
i should make a link to your page, from mine, if you dont mind, please reply, thx
IKEA’s got some really nice solutions as well…(no,
I don’t work for IKEA, but my thumb is in the middle of may hand…)
By all means, if you want cheap tacky stuff that doesn’t last, waste a day in an ikea cave and come out with something the same as all other suburbanites, or do something different and make this personal project. Our kitchen starts being fitted tomorrow (not ikea as they do units which are flat to the wall which are no use for any plumbing or electrics and charge too much) and once it’s finished i will be using this idea to enhance the under sink units.
thank you
…
meantime i am off to make some chutney in what is left of the old kitchen!
Wow…idea is awesome that how we occupy our free space…..Great….
We sell products like this. Client LOVE them.