Step 11: Trim the bottom of the posts
The metal post bases will prevent the 1×4 trim boards from fitting snugly against the posts. Before cutting the trim boards (G), run the full-length cedar 1x4s vertically through a table saw a couple times until about 3/16 in. of material has been removed.
Fasten the trim boards to the posts with an 18-gauge trim gun fitted with 2-in. galvanized brad nails (Photo 13). Strengthen the joint by applying construction adhesive before nailing them together. Secure them with brad nails at the top of the boards and through the miters. Install them up away from the ground to keep them dry.
Step 12: Assemble the tabletop and shelf frames
Cut the table frame ends and center braces to size (H and J). Use a square to mark a line on both posts up 41 in. from the slab. That will be the top of the frame. Install the ends 1 in. away from the outside edge of the inside post, and secure them with 3-in. exterior wood screws, two in each post. Measure and cut the table frame sides to size (K). Install the board with screws angled into the post. This keeps them from being visible after the top is installed.
Measure the distance between the posts and cut the cedar 2×4 that will serve as the skirt nailer (L). Center it on the outside post, which leaves 1 in. on each side. This will make the skirt boards flush with the outside edge of the posts.
Install the center braces (J) 20 in. in from each post. Secure them by angling two screws into the side boards (so they’re not visible) and one down into the skirt nailer (Photo 14).
Cut the shelf frame ends and centers to size (M and N). Use a square to mark a line on both posts up 15 in. from the slab. That will be the top of the shelf frame. Install the end pieces so they overlap onto each post 1 in. Cut the shelf side boards (P). Secure them to the end boards with screws. No need to angle these screws because the outside screws will be covered with the skirt boards, and the inside ones are too low to notice. Install the shelf center boards, 20 in. in from both posts.
Step 13: Install the tabletop, shelf and skirt boards
Cut the deck boards for the table top (Q) to fit between the posts at each end. Secure them with two 2-in. exterior-grade trim-head screws through each deck board. Keep the screws about 1 in. from the edges of the deck boards. Start with the table-top board closest to the inside, and line it up with the edge of the inside posts (Photo 15). There’s no need for a gap between the boards.
Measure and cut the shelf boards (R) to length. Rip two of them down to 4 in. Install the cut end flush with the outside edges of the shelf frame so they’re hidden by the skirt board.
Cut the skirt boards (S) to length. Center the first one between the posts and install it with two trim-head screws to the skirt nailer and shelf frame. Work your way in each direction, and trim down the last skirt boards to fit flush with the posts.
Remove all the temporary braces and touch up all the cut ends of the boards with stain. All that’s left is to slide your grill into place and invite the neighbors over for a party under your barbecue gazebo.
Project step-by-step (15)
Step 1
Mark Post Locations
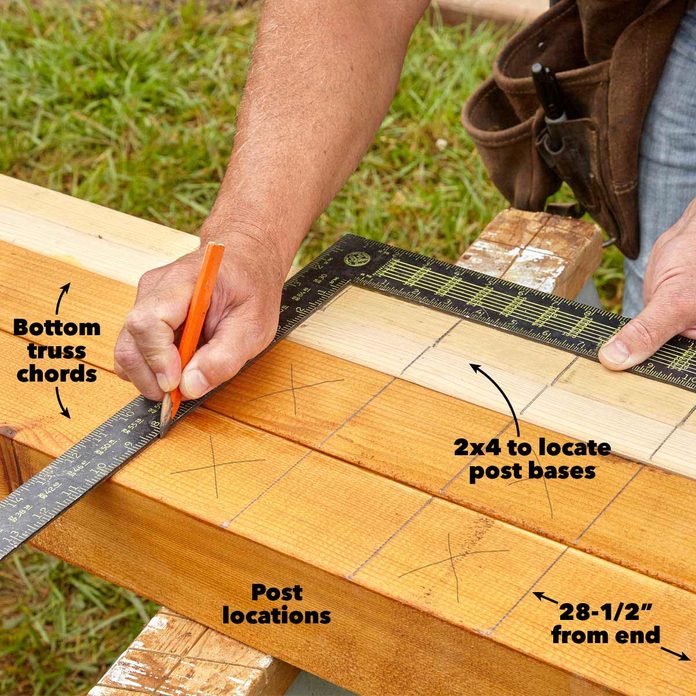
Align the two bottom truss chords next to each other in order to mark the post locations. Mark two 12-ft. 2x4s at the same time. You’ll use them later to make a template that will position the posts perfectly on the slab.
Step 2
Screw the Truss Chords to the Post
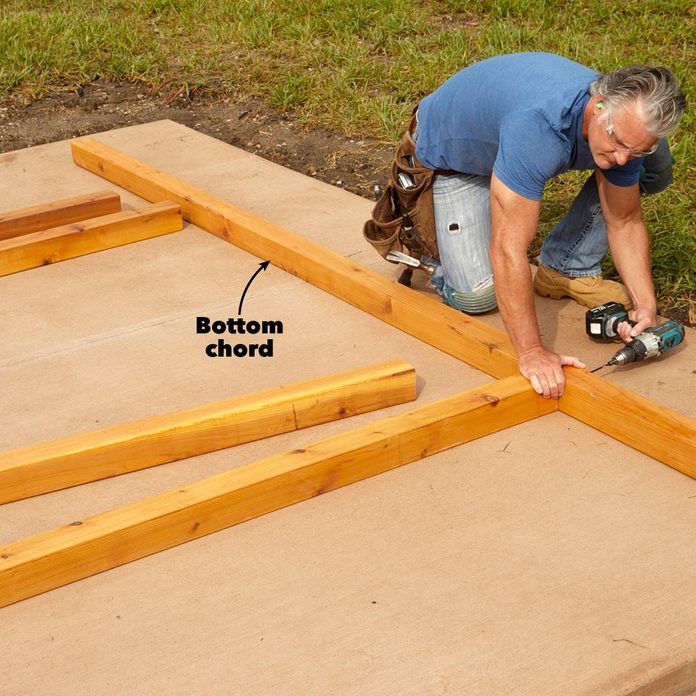
The slab is the perfect surface to assemble the ends of the grillzebo. Secure each post to the chords with two 6-in. structural wood screws.
Step 3
Mark the Top Chords
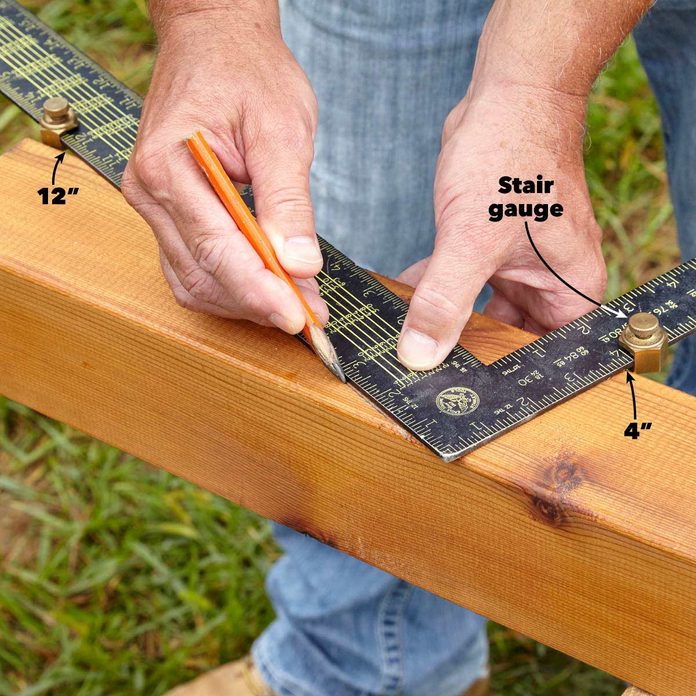
Use a framing square to mark the long angle cuts at the bottom of each chord. Stair gauges placed at 4 in. and 12 in. guarantee correct marking on all four.
Step 4
Finish Cuts With a Handsaw
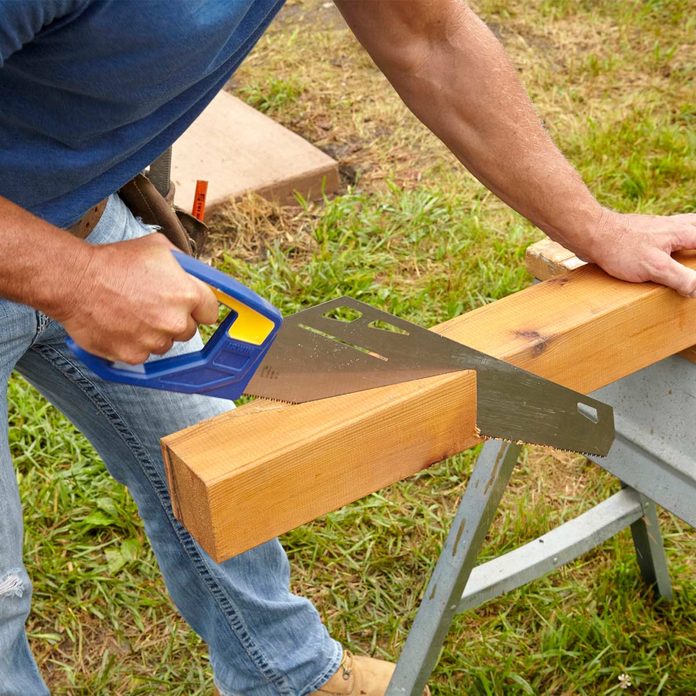
Cut the long angles with a circular saw first. A standard circular saw with a 7-1/4-in. blade won’t cut all the way through, so you’ll have to finish the cut with a handsaw.
Step 5
Mark the Truss Webbing
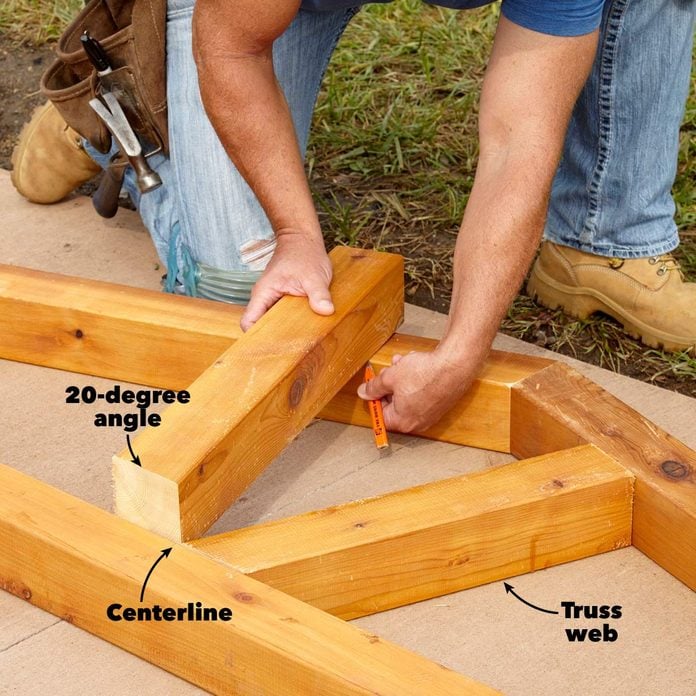
Cut each truss web a little long. Line them up with the center of the bottom chord, and mark the tops with a pencil.
Step 6
Position Posts With a Template
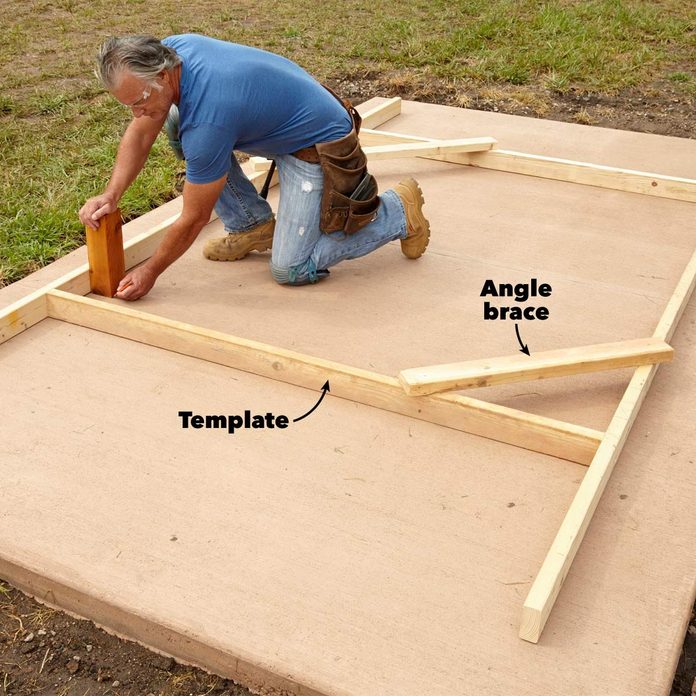
Center the template on the slab. Square it up by measuring diagonally from inside corner to inside corner in both directions. Attach a couple angle braces on two corners to keep the template square. Use a 4×4 scrap to mark the post base locations on the concrete.
Step 7
Install the Post Bases
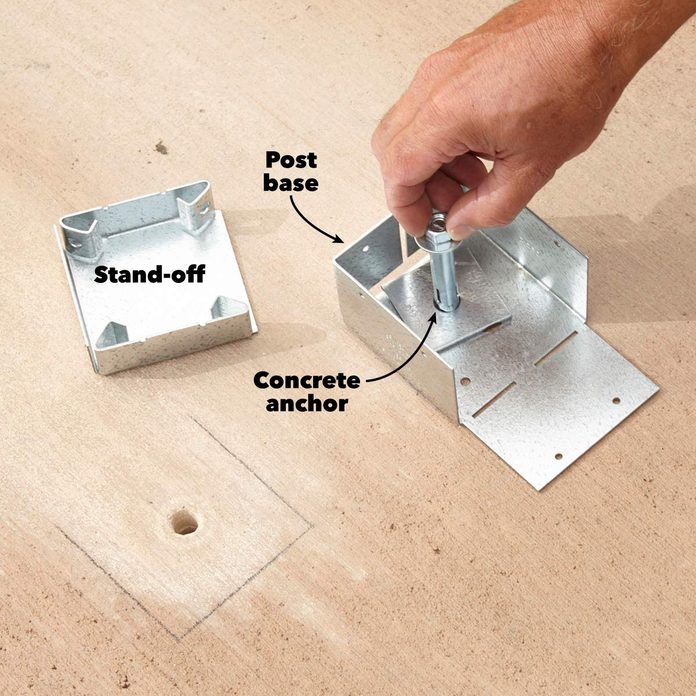
Drill holes for the concrete anchors and fasten the post bases. (Check the anchor requirements for your particular base.)
Step 8
Plumb and Brace the Posts
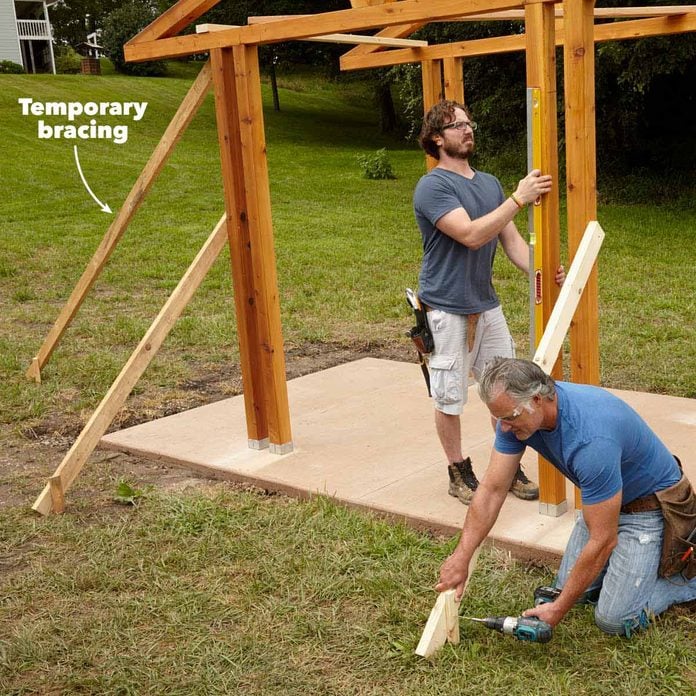
Stand up one side of the grillzebo and fasten the posts to the bases. Make sure all the posts are plumb as you add temporary braces.
Step 9
Install the Angle Braces
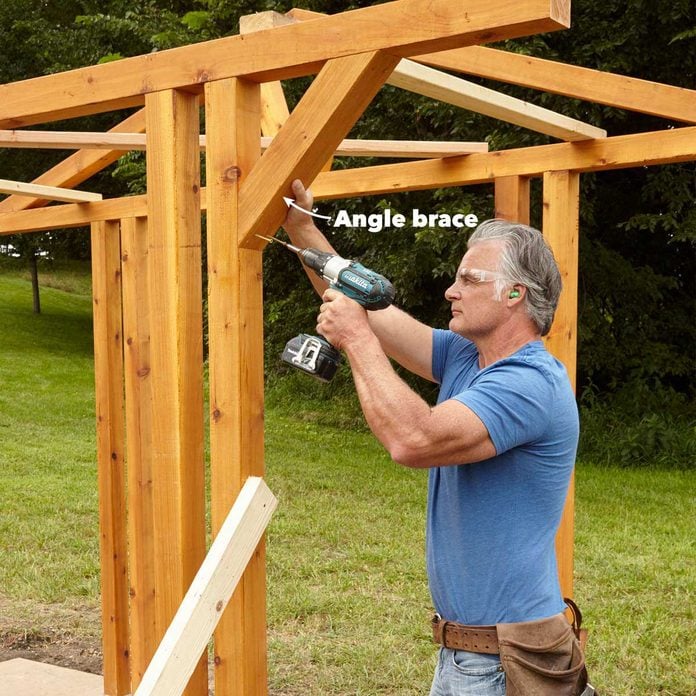
Fasten the braces with two 3-in. exterior-grade screws angled in at the top and bottom of the brace.
Step 10
Find the Length of the Purlins
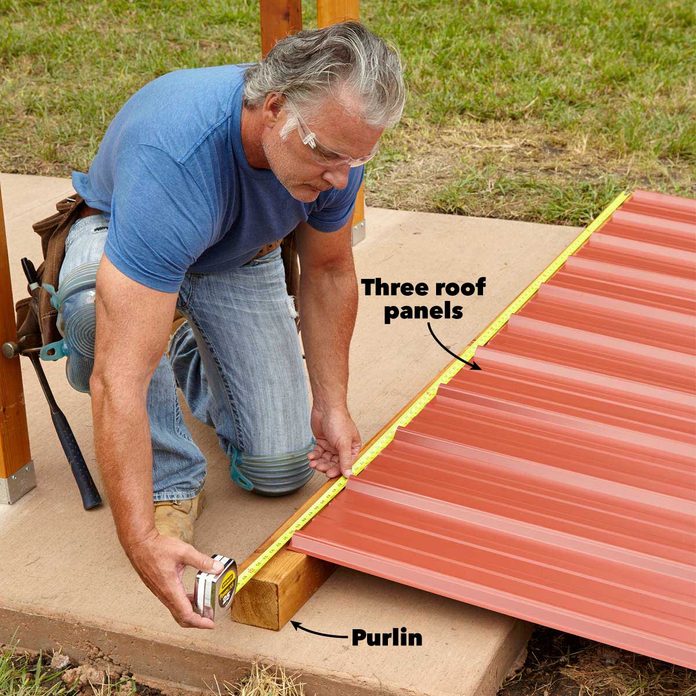
To avoid cutting the roof panels to width, overlap them. You want them to cover about 8 ft. A little less is fine. Use your roof panel layout to mark the length of the purlins.
Step 11
Install the Purlins
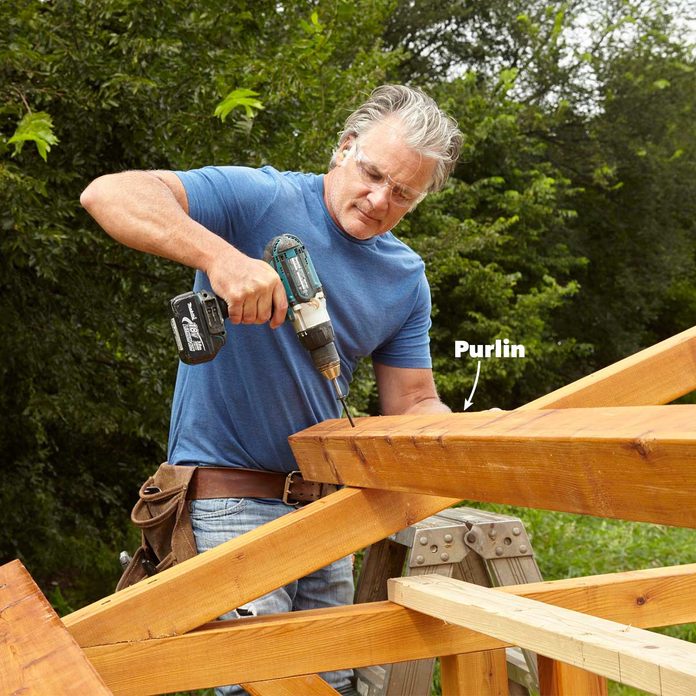
It’s important that the purlins all overhang the same amount. Secure each purlin to the trusses with two 6-in. structural screws in each end.
Step 12
Install the Roof Panels
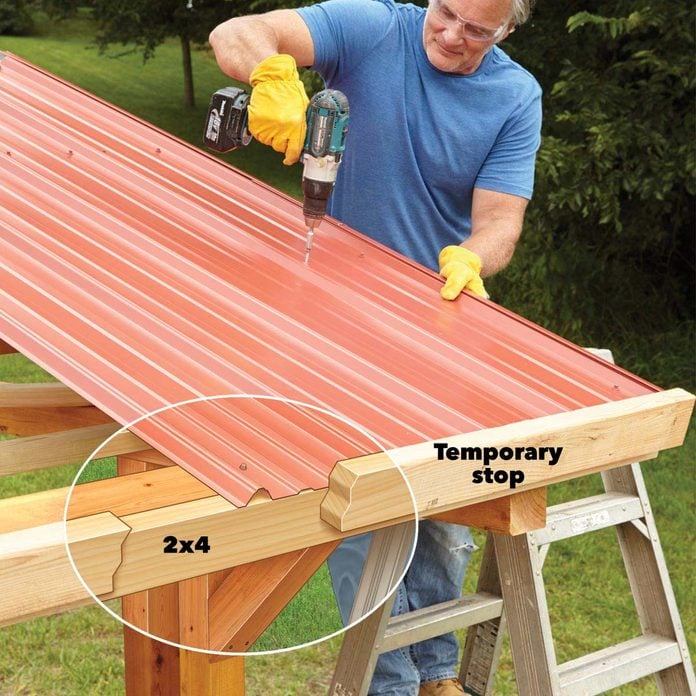
Screw two 2x4s to the bottom purlin. The 2x4s will act as a stop, making it easy to install the panels with a perfect 1-1/2-in. overhang.